
How do I setup a "KA-Pi"?
(To download KA-Pi en Español, see the HOW TO - KA-Pi Spanish version)
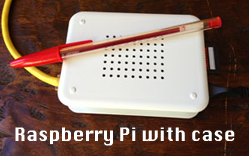
1 - Get your Raspberry Pi
First of course you need a Raspberry Pi (you may already have one, or many of them.., so in this case just skip this step..). If you never heard about it, it is basically a credit-card sized Linux box, and you can find all about it at www.raspberrypi.org. If you need to buy one you have to also buy the power supply. A plastic case is strongly recommended. Also, get the Model B, which has 512Mb RAM.
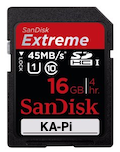
2 - Get a 16 GB SD Card ready.
You'll need a 16 GB SD flash memory card, to host the operating system and the KA-Pi package. It is recommended to get a fast card. For instance, I use for KA-Pis a SanDisk Extreme 16 GB SDHC Class 10 card, which you can get at Amazon for less than U$S 19, and has up to 45 MB/s read-write speeds.
3 - Download the "KA-Pi" image.
Think of the image as an exact copy of the whole hard drive of your PC or Mac, everything in just one file. In this case you will use this "image" file to then burn it, or write it, to your own SD card, making so an exact clone of an original KA-Pi server SD card I have with me. You are going to download it by FTP:
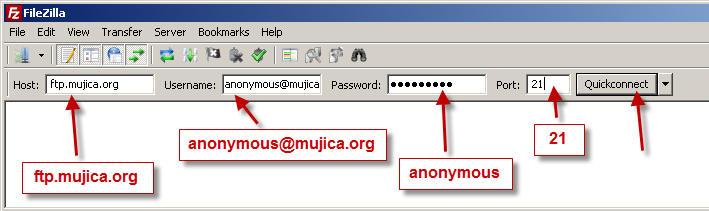
- FTP connection: Host = ftp.mujica.org , Username = anonymous@mujica.org, Password: anonymous, port = 21 (default).
Example: FTP download on Windows:
A very good and free FTP client for Windows, Mac and Linux is FileZilla ( filezilla-project.org). It has very important features (Keep-alive, auto reconnect) for downloading very large files like this.
Sample FTP login using FileZilla:
Once connected you'll see the files in the server available for FTP download. Go to the "pi" folder and drag the kaos_pi_16_20130921.img file to a folder in your computer. Example using FileZilla on Windows:
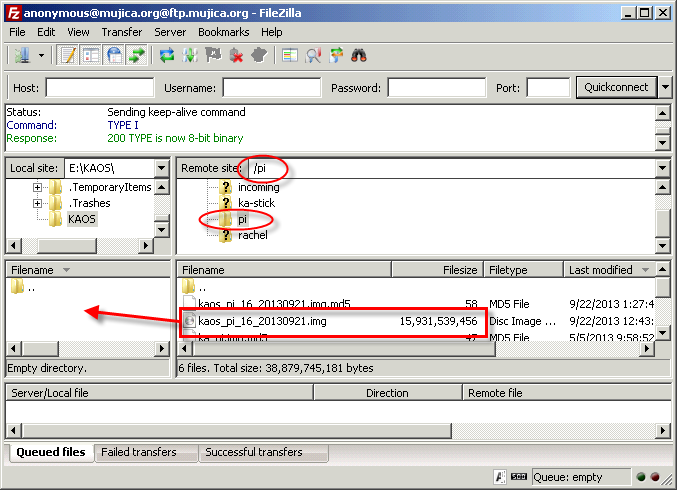
The FTP download will start.
Linux Example: FTP command line download:
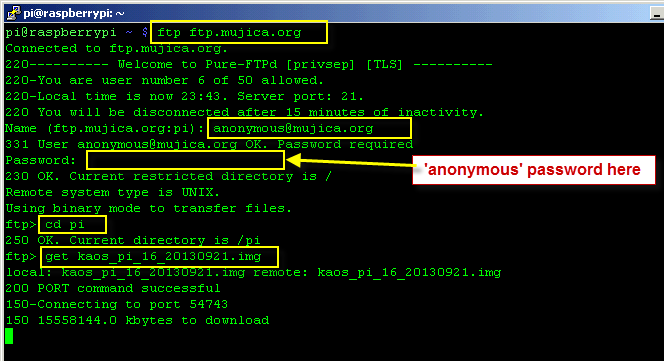
Download from Linux using wget. Example:
wget ftp://anonymous%40mujica.org:anonymous@ftp.mujica.org/pi/kaos_pi_16_20130921.img

WARNING: This is a very large file, which may take a very long time to download, even hours if you don't have a fast Internet connection.
Important: if you want to verify the integrity of this very large downloaded file, which is strongly recommended to make sure that it has arrived intact during the long download process, this is the file md5 checksum:
- For the kaos_pi_16_20130921.img file: 7778f4caa756897f2044d4ba44820cc3
To verify if the MD5 checksum of the downloaded file matches the checksum of the original file (listed above) you can use on Windows a free tool like WinMD5Free (www.winmd5.com). Sample screenshot:

On Linux/UNIX you can just run the md5sum command, like: $ md5sum kaos_pi_16_20130921.img
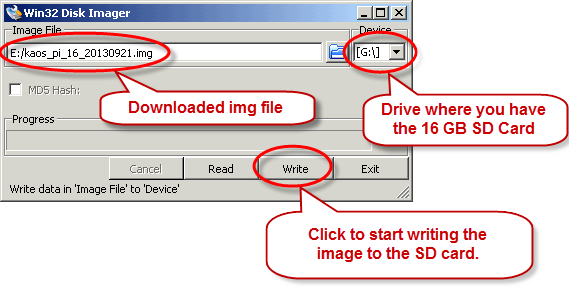
4 - Write the downloaded KA-Pi image to your SDHC memory card.
This is what you need to do (example on Windows):- Download Win32DiskImager, a free Windows software, from http://sourceforge.net/projects/win32diskimager/files/latest/download
- Unzip it and install it in your PC/laptop.
- Plug your SD card into your PC.
- Start the Win32DIskImager software (Win32DiskImager.exe)
- Select the downloaded ka_pi.img file and the drive where the SD card is inserted. Then click the "Write" button:
Now you have a card with the OS and the pre-configured KA-Pi package ready for action.
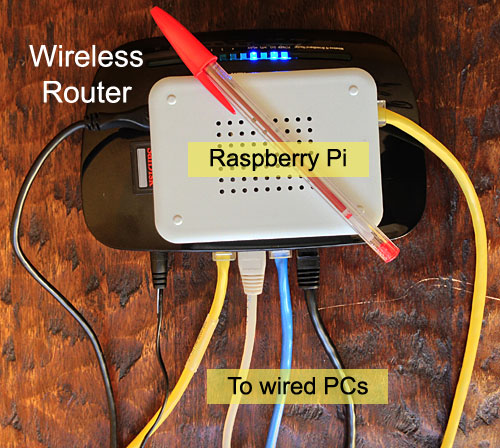
5 - Setup your KA-Pi server.
- Insert the SD card into the Raspberry Pi slot
- With the Raspberry Pi already plugged to your network or wireless router start the Pi, just plugging the power (If you want to login to this KA-Pi distribution please use username: pi , password: rachel . Of course you can change the password afterwards to anything you want..).
Sample setup with a $45 consumer wireless router:
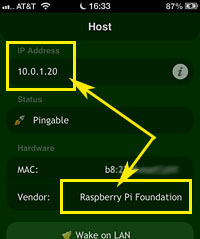
- Find out the IP address of the Raspberry Pi:
- If you plug a TV to the Pi via an HDMI cable or composite cable you'll see the IP address at the bottom of the boot messages on the screen.
- Or from a terminal on the pi use the ifconfig command:
pi@raspberrypi ~ $ ifconfig
eth0      Link encap:Ethernet  HWaddr b8:27:eb:ce:67:31
          inet addr:10.0.1.20  Bcast:10.0.1.255  Mask:255.255.255.0
          UP BROADCAST RUNNING MULTICAST  MTU:1500  Metric:1
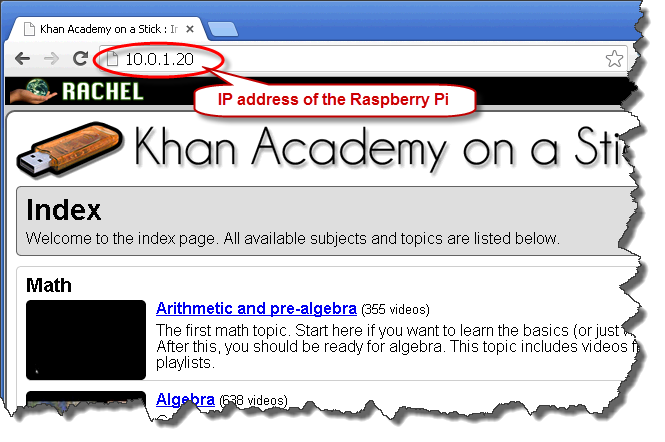
The IP address in the example above is 10.0.1.20
For instance you can just you a phone connected to the same wi-fi network and use an app to scan it and find out the connected computers. The one which vendor name is "Raspberry Pi Foundation" is your Raspberry Pi. Make note of the IP address, 10.0.1.20 in this example. (Using the Scany iPhone app for this screenshot on the right).
6 - Start using Khan Academy.
- Now a computer or device connected to this network, wired or wirelessly (wi-fi), will be able to access and play the Khan Academy content, just by entering the IP address of the Raspberry Pi in a browser URL field:
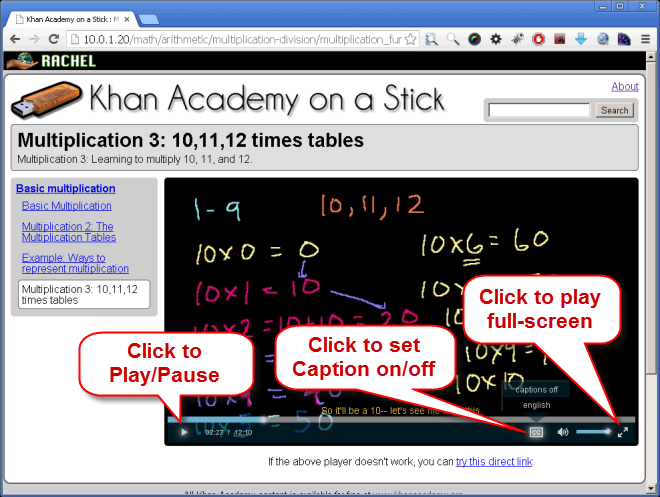
- Now, after having directed your students (or just yourself) to the IP address of the KA-Pi server people can start browsing and using the Khan Academy video lectures as needed.
7 - Optional: Use your KA-Pi as a Wi-Fi hotspot
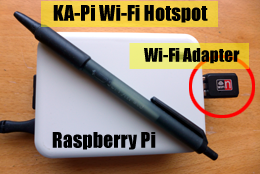
The latest KA-Pi image already includes all the software necessary to use the Raspberry Pi as a Wi-Fi hotspot. This pre-configured software is running all the time on your KA-Pi package: You just need to plug a USB WiFi Adapter to a USB port and start the Raspberry Pi.
It will automatically create a Wi-Fi hotspot called "RPI", to which you can connect from any Wi-Fi enabled device, like a tablet, laptop or smart phone, and access wirelessly the Khan Academy videos, without the need to use any other network device, like a wireless router. Perfect for an instant setup of a wireless educational hotspot.
Another advantage is that you'll need just the Raspberry Pi power adapter and cable, which will in this case power the Raspberry Pi computer and the USB dongle-based Wi-Fi hotspot.
Simple steps:
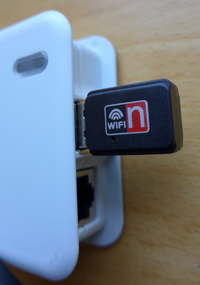
- Plug a USB WiFi adapter into a USB port of the Raspberry Pi. The adapter has to support the Access Point or master mode. There are many models of non-expensive ones based on Ralink chipsets.
Sample supported adapters:
Amazon $7
dx.com $6
- Power up the Raspberry Pi (plug the power cable)
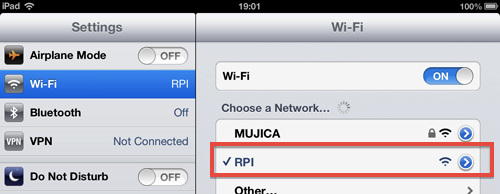
- From a WiFi computer or mobile device connect to the "RPI" Wi-Fi network:
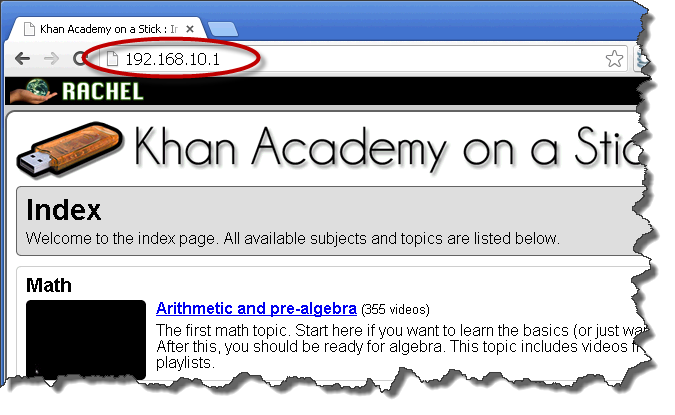
- From the computer or device enter the 192.168.10.1 address in the browser URL window:
- Navigate the Khan Academy video playlists and play the videos
Note: The above Wi-Fi setup can be used together with the previous network setup. So you can have the Raspberry Pi running KA-Pi connected via network cable with a router and at the same time running the Wi-Fi hotspot from the Pi. So some students can connect to the local network setup by the router and to the "RPI" wireless network created by the USB Wi-Fi adapter.
Problems downloading or setting up "Khan Academy on a Pi"?
Please do not hesitate to contact me should you have problems to download or setup KA-Pi. You can contact me as described in the About page and I'll be happy to respond.
Other Notes
- A choice had to be made about the videos format. There is no single video format and video/audio encoding that can be played in all web browsers and operating systems out there (This table online shows which video formats are likely to be supported by a given browser). In this case H.264 video and ACC audio encoded videos in an mp4 container was chosen. This can be played on latest versions of modern browsers supporting HTML 5, as well as iOS devices (iPads, iPhones, iPod Touch) and Android devices. See list of supported browsers in the About page.
- The videos in this distribution are encoded in a relatively low bitrate. This makes their file size fairly small, and makes possible as in this case to have a package for the Raspberry Pi that includes the OS and 3,000 video lectures that fits in a 16 GB memory card. The Khan Academy on a Stick distribution have been deployed in hundreds of remote locations around the world, and a reduced overall size has proven critical on the ground for downloading, installing on devices with reduced storage, cloning, etc.